众所周知ASP.NET 2.0里对本地化(Localization)做了很多工作,大大简化了开发过程。今天终于能抽出时间研究一下这个技术了,资料很多,但大多带着一股咬文嚼字的翻译味道,So自己写一篇。


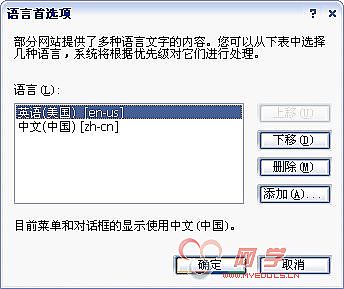
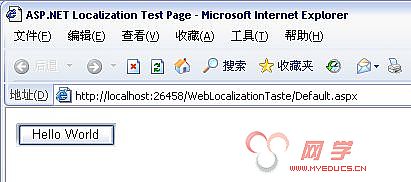
- [
- Bindable(true),
- Category("Appearance"),
- DefaultValue("Hello"),
- Description("The welcome message text."),
- Localizable(true)
- ]
- public virtual string Text
- {
- get
- {
- string s = (string)ViewState["Text"];
- return (s == null) ? "Hello" : s;
- }
- set
- {
- ViewState["Text"] = value;
- }
- }
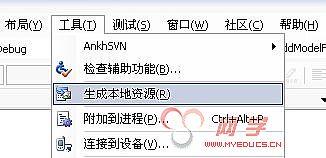
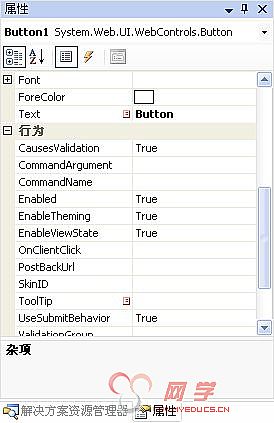
查了许多关于WEB控件开发的资料,其中都对这个AttributeProperty做了忽略,原来只有当控件的属性声明为Localizable(true)时,VS的生成本地资源工具才会扫描到。
3.手工添加本地化资源
第一点中提到过生成本地资源工具只能扫描到页面已经包含的控件,那么如果后面由于开发需要又增加了一个新的控件要怎么办呢?虽然大部人都能自己想到,但还是写一下吧。
从工具箱再拖一个Label控件到页面上,切换到源视图,修改代码如下:
再修改两份本地资源文件,为Label1添加Label1Resource1键值的相关资源,如下图所示:
- <asp:Label ID="Label1" runat="server" meta:resourcekey="Label1Resource1" Text="Label"></asp:Label>
 Default.aspx.en-s.resx
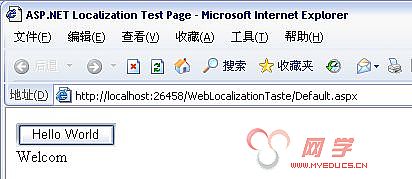
  再运行程序,切换语言设置,可以看到Label1的效果和Button1是一样的,如图所示:
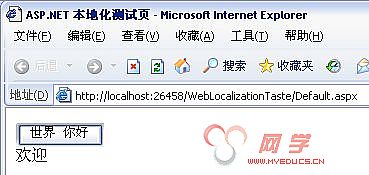 英语(美国)
  4.显示使用本地化资源OK,前面提到的都是隐式使用本地化资源,那么如何显示的使用本地化资源呢?相对于隐式来讲,显示更加灵活,功能也更强大。只需要将刚才的Label1的代码,
修改为,即可。
- <asp:Label ID="Label1" runat="server" meta:resourcekey="Label1Resource1" Text="Label"></asp:Label>
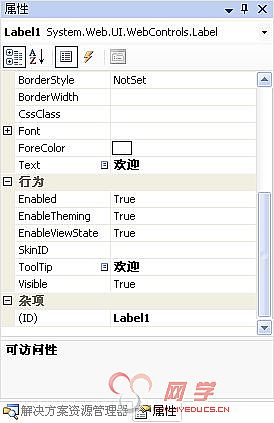
这时切换到[设计]视图,选中Label1控件,查看属性视图,会发现Text和ToolTip被加上的是蓝色的符号,提示“属性绑定了表达式”。跟上面提到的红色符号比较,少了“隐式”二字,这也就是所谓的显式和隐定的来源吧,如下图所示:
- <asp:Label ID="Label1" runat="server"
- Text="<%contentnbsp;Resources:Label1Resource1.Text %>"
- ToolTip="<%contentnbsp;Resources:Label1Resource1.ToolTip %>" >
- </asp:Label>
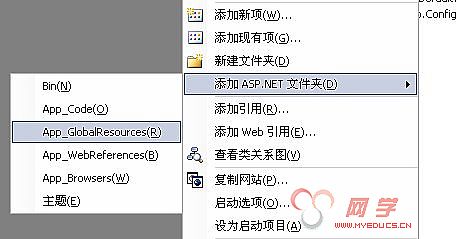
 5.全局资源的使用(GlobalResources)前面提到过,本地资源需要为每个页面分别生成多个资源文件,虽然这样看起来分门别类的挺清楚,但在实际应用过程中,我们有许多资源是可以共享的,总不能不停的重复写来写去吧。其实这种情况我们可以用全局资源(GlobalResources)来解决。在资源方案视图中选中网站,右键,点击[添加ASP.NET 文件夹]->[App_GlobalResources],如图所示:
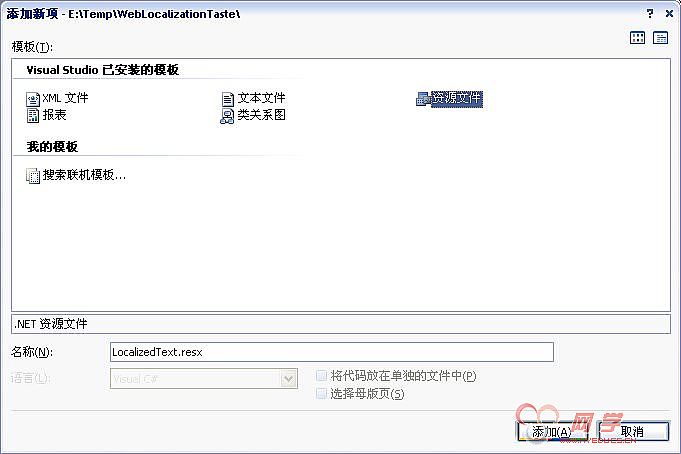
 再选中App_GlobalResources文件夹,右键,点击[添加新项],在弹出的对话框中选中“资源文件”,命名为“LocalizedText.resx”,点击[添加],如图所示:
 双击LocalizedText.resx进行编辑,添加一条新的字符串资源,如图所示:
 复制LocalizedText.resx,粘贴到App_GlobalResources目录,重命名为LocalizedText.en-us.resx,双击进行编辑,添加一条新的字符串资源,如图所示:
 打开Default.aspx,切换到[设计]视图,从工具箱拖一个TextBox控件到页面上。切换到[源]视图,修改代码:
运行程序,切换语言设置,可以看到全局资源的使用效果了,如图所示:
- <asp:TextBox ID="TextBox1" runat="server" Text="<%contentnbsp;Resources:LocalizedText, Msg1 %>"></asp:TextBox>
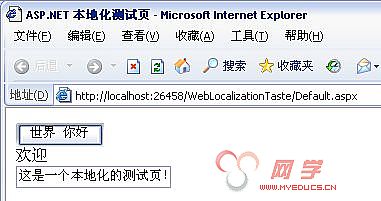 英语(美国)
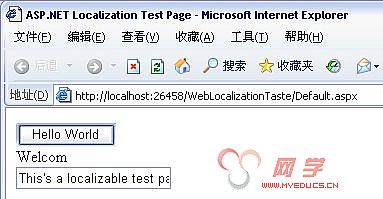 注意:全局资源不能使用隐式声明。
记得添上这个引用
- protected void Button1_Click(object sender, EventArgs e)
- {
- Localize1.Text = (String)GetLocalResourceObject("Label1Resource1.Text") + " " +
- (String)GetGlobalResourceObject("LocalizedText", "Msg1");
- }
运行程序,切换语言设置,可以看到和前面使用表达式调用资源的效果是一样的,如图所示:
- using System.Globalization;
 英语(美国)
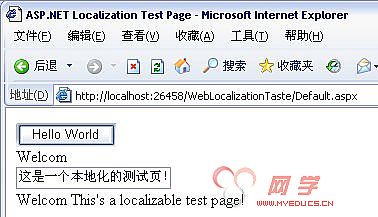 7.动态切换语言设置以上的介绍都是通过IE浏览器获取语言设置,其实我们可以自己设置使用哪种语言。1)通过在每个页面里的Page节指定
- <%@ Page Culture="en-us" UICulture="en-us" %>
如上所设,该页将使用en-us的语言设置。
注意:这只是个概要式写法,实际的页面中的Page一般都包含更多的属性。
2)通过在Web.Config里的globalization节指定
- <system.web>
- <globalization Culture="en-us" UICulture="en-us" />
- </system.web>
3)当然还有一种就是通过编程动态切换语言设置啦,这也是实际项目中经常用到的方式
打开Default.aspx,切换到[源]视图,添加如下代码
打开Default.aspx.cs,添加如下代码
- <a href="?currentculture=zh-cn">中文(中国)</a>
-
- <a href="?currentculture=en-us">English(USA)</a>
记得添上这个引用
- String s;
- protected override void InitializeCulture()
- {
- s = Request.QueryString["currentculture"];
- if (!String.IsNullOrEmpty(s))
- {
- //UICulture - 决定了采用哪一种本地化资源,也就是使用哪种语言
- //Culture - 决定各种数据类型是如何组织,如数字与日期
- Thread.CurrentThread.CurrentUICulture = new CultureInfo(s);
- Thread.CurrentThread.CurrentCulture = CultureInfo.CreateSpecificCulture(s);
- }
- }
运行程序,分别点击新增加的两个链接,效果如图所示:
- using System.Threading;
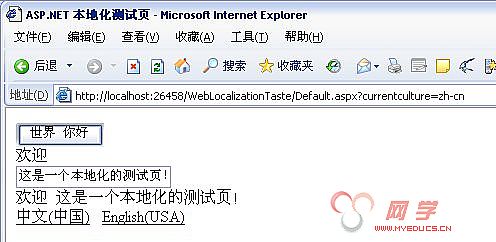 Enlish(USA)
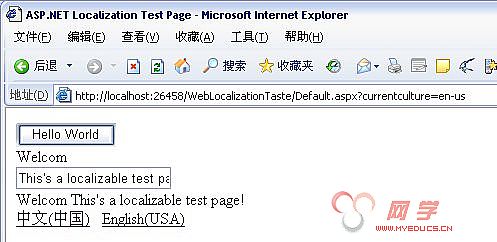 8.使用图片资源分别编辑LocalizedText.resx和LocalizedText.en-su.resx,添加图片资源,如图所示:
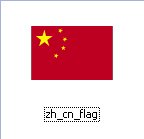 LocalizedText.en-su.resx
 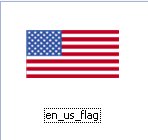 注意:当图形文件添加到图形资源里时,系统会自动去除扩展名并把“-”替换成“_”,如上图,我的文件名为“en-us-flag.png”添加到资源里变成了“en_us_flag”。打开Default.aspx,切换到[设计]视图,从工具箱拖一个Image控件到页面上。打开Default.aspx.cs,添加如下代码
选中网站右键,创建一个新的WEB窗体,命名为Image.aspx,编辑该页面,在Page节增加如下代码
- protected void Page_Load(object sender, EventArgs e)
- {
- Image1.ImageUrl = "~/Image.aspx?currentculture=" + s;
- }
- <%@ Page Language="C#" AutoEventWireup="true" CodeFile="Image.aspx.cs" Inherits="Image" Culture="auto" UICulture="auto"%>
注意:默认创建的WEB窗体的Page节,不包括Culture和UICulture这两个属性,一定要手工添上,切记!
打开Image.aspx.cs,添加如下代码
- protected override void InitializeCulture()
- {
- String s = Request.QueryString["currentculture"];
- if (!String.IsNullOrEmpty(s))
- {
- //UICulture - 决定了采用哪一种本地化资源,也就是使用哪种语言
- //Culture - 决定各种数据类型是如何组织,如数字与日期
- Thread.CurrentThread.CurrentUICulture = new CultureInfo(s);
- Thread.CurrentThread.CurrentCulture = CultureInfo.CreateSpecificCulture(s);
- }
- }
- protected void Page_Load(object sender, EventArgs e)
- {
- System.Drawing.Bitmap img = (System.Drawing.Bitmap)GetGlobalResourceObject(
- "LocalizedText",
- CultureInfo.CurrentCulture.Name.ToLower().Replace("-", "_") + "_flag");
- System.IO.MemoryStream ms = new System.IO.MemoryStream();
- img.Save(ms, System.Drawing.Imaging.ImageFormat.Jpeg);
- Response.ClearContent();
- Response.ContentType = "image/jpeg";
- Response.BinaryWrite(ms.ToArray());
- img.Dispose();
- ms.Dispose();
- ms.Flush();
- }
当然,别忘了添上这两个引用
- using System.Threading;
- using System.Globalization;
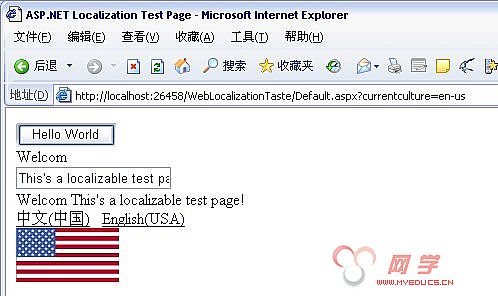
运行程序,分别点击两个链接,效果如图所示:
中文(中国)
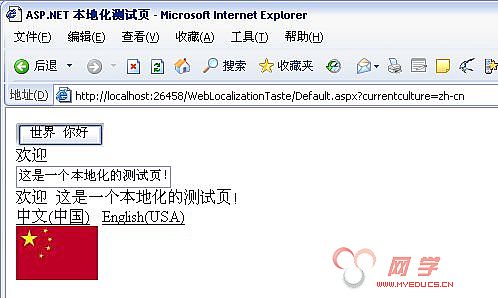
English(USA)
